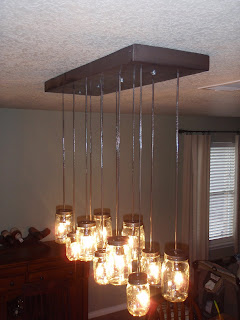
We just finished our mason jar chandelier!
Isn't it fun what you can do with mason jars?! I fell in love with Pottery Barn's exeter 16-jar pendant. I HAD to have it in our home, but not for $399.00! So, I spent several months perusing blogs written by people that had created their own, but was never able to find a detailed tutorial or a chandelier quite like the one I wanted. After a zillion trips to Lowe's and The Home Depot with Greg, we were able to create a design and plan for our perfect chandelier. After a few test runs, we succeeded! So, for all of you out there that have been wanting to recreate PB's mason jar chandelier, but don't quite know how to do it, here is a step-by-step how-to! Enjoy!
Things You Will Need:
(12) mason jars (I used 6 quart size & 6 pint size)
50' of 18-2 lamp wire
(12) keyless sockets
(12) light bulbs of your choice (I suggest using a low wattage bulb)
24"x48" sheet of metal
(4) 4" lag screws with washers
(4) self tapping steel screws
(2) wire nuts
Cordless drill & drill bit
Electrical tape
(1) can of rustoleum
**Be prepared to dedicate about an entire day to this project**
Plan your design: Decide the size of ceiling plate you want, the spacing between each cord, and how long you want each cord to be. Your desired cord length will determine how much lamp wire you need to buy. Our cords ranged between 2'4"-2'8".
Score the sides of sheet metal so that you can bend them to form sides. You can use self tapping steel screws to hold the sides together.
Drill holes for your cords (12) and holes to mount the plate to the ceiling (4).
Spray paint your ceiling plate.
Cut your lamp wire to your desired lengths.
Spray paint the cords.
Drill holes in the lids of the jars. We drilled two smaller holes in each lid to prevent over heating of the jars.
Spray paint the lids.
**If you are unsure when it comes to the electrical wiring, ask the electrical/lighting department at your local home improvement store. They can help you!**
Attach one end of the lamp wire to the keyless socket. Screw in light bulb. Slide jar lid on top. (Do this for
each cord)
String cords through the holes in your ceiling plates. Tie knots in each cord to hold them into place. Strip the end of the lamp wire cord.
Attach wires to wire nut and then to ceiling box.
Finally, just screw the ceiling plate to the ceiling and attach your mason jars to their lids :)
Enjoy! Feel free to email me if you have any questions!
This is Pottery Barn's version for $399.00
And this is ours for less than $100.00


